Home Assistant continues to add great new features with every update. In Home Assistant 2026.4, a new Infrared integration was added that can enable you to control dumb devices in your home that use infrared remotes. These include devices such as TVs, air conditioning units, audio devices, and more.
Native infrared support has landed in Home Assistant
Create your own IR proxies

One of the key additions in Home Assistant 2026.4 was infrared support. At first, this may not seem like anything new. I’ve been using IR blasters with Home Assistant for years, allowing me to control infrared devices using Home Assistant by sending out the appropriate signals.
However, the new Infrared integration in Home Assistant 2026.4 is different. It marks the first time native infrared support has come to Home Assistant, allowing you to set up infrared entities. This allows device-specific integrations to send commands to infrared-controlled devices using infrared emitter hardware, such as a device powered by ESPHome.
Just as you can use ESPHome to create Bluetooth proxies for communicating with Bluetooth devices, you can now create IR proxies using cheap hardware that you can use to send out IR signals to devices around your home.
The hardware you’ll need
An IR proxy for under $10
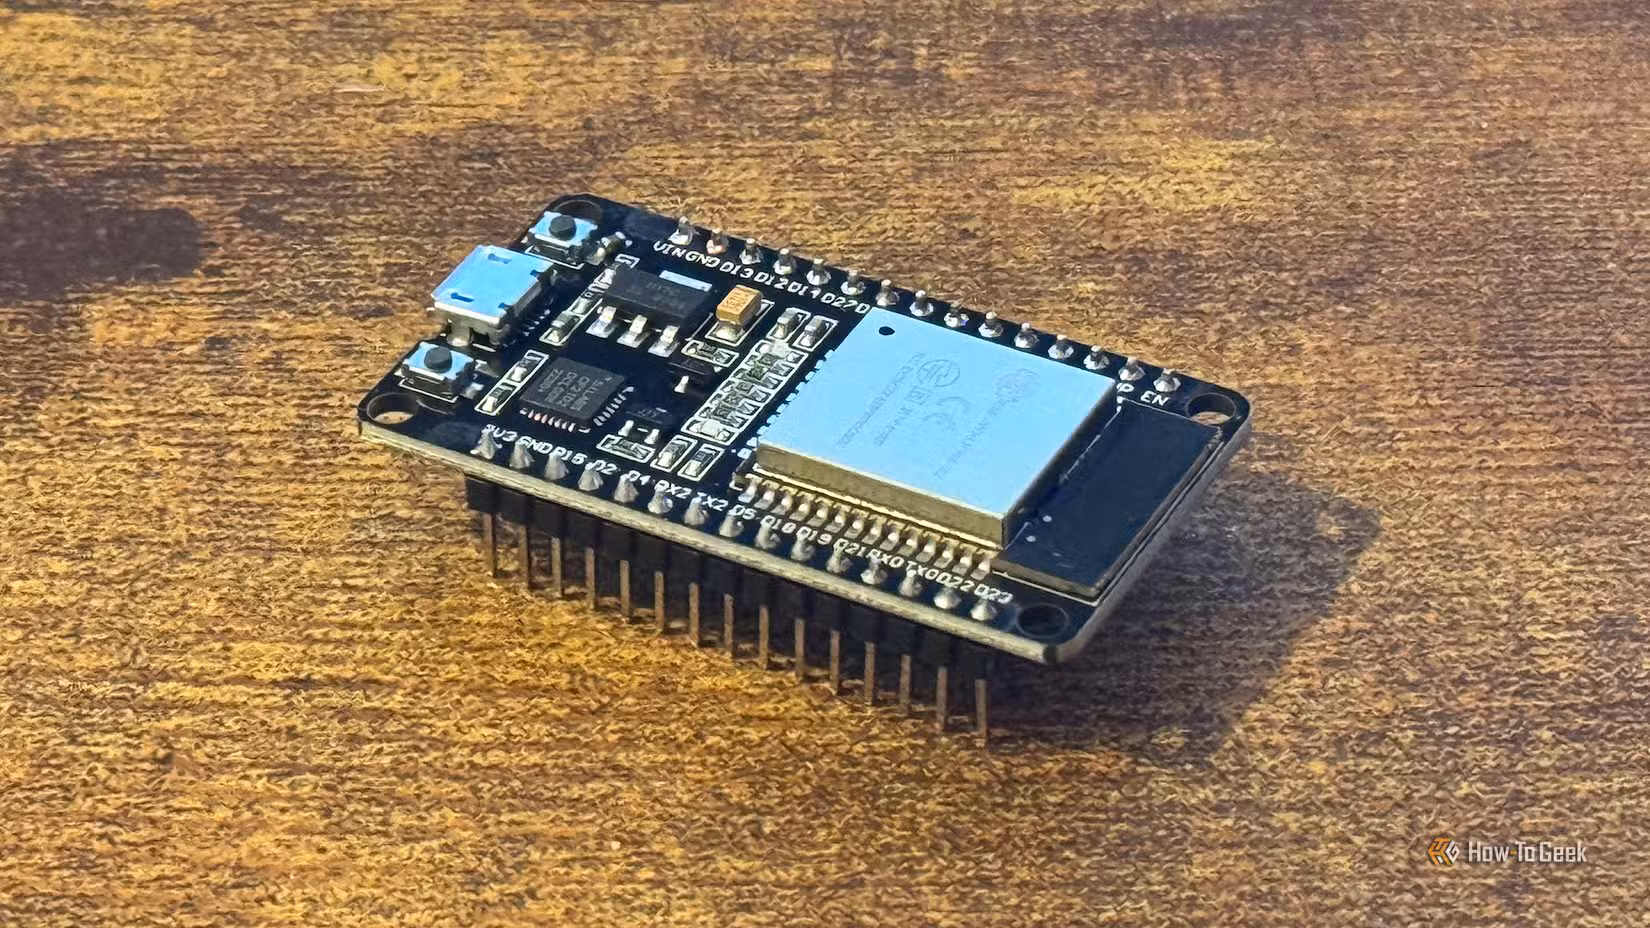
You can get a cheap IR blaster for under $20, but you can set up an IR proxy for even less. Home Assistant recommends that the quickest way to get started is with the Seeed Studio XIAO Smart IR Mate. It uses a XIAO ESP32-C3 and is designed specifically for use with Home Assistant. You can get one for under $10, and the price drops further if you buy more than 10.
The beauty is that this device is part of the ESPHome Ready-Made Projects, so you don’t need to write any YAML yourself. You simply connect the device to your computer, and you can flash it directly from a browser. You can then add the infrared proxy to Home Assistant and use it to control devices in your home using a device-specific infrared integration.
The XIAO Smart IR Mate also includes a touch module, vibration motor, and LED. As well as controlling it via Home Assistant, you can also touch it to send out an IR signal, so you could use it as a physical button to turn your TV on and off, for example. The device can learn up to 10 commands from an IR remote, and you can send any of the stored commands directly from Home Assistant.
What you can do with an IR proxy
Good news if you own an LG TV
The Infrared integration in Home Assistant is a building block integration. This means that you can’t add the Infrared integration directly to the Home Assistant integrations page like you can with a standard integration. It acts as a foundation for device-specific integrations, allowing them to create infrared entities in Home Assistant.
With the release of Home Assistant 2026.4, there was only one infrared integration available: the LG Infrared integration, although plenty more are expected. The LG Infrared integration lets you control an LG TV using your infrared proxy. You can use the integration to mimic functions of the remote control, such as powering the TV on and off, switching between HDMI and other inputs, navigating menus using the up, down, left, right, and OK buttons, using other buttons such as Back, Exit, Home, Menu, Info, and Guide, and entering the digits 0 through 9.
One issue with using infrared in Home Assistant, whether through an IR blaster or the new infrared integration, is that there’s no feedback from the TV. If you send the Power On signal, the IR proxy won’t receive any confirmation of whether the TV has powered on or not. Instead, the integration relies on an assumed state; if you send the Power On signal, the integration assumes that the TV has indeed turned on.
This may not be the case if the IR signal gets blocked, for example. This can send your automations out of whack, causing your TV to turn on when you want it to turn off and vice versa. You can often compensate for these issues by using other signals, such as the power draw through an energy-monitoring smart plug or the state from another integration, to determine when the TV is on or off.
Another limitation is that you can’t send a signal to set a specific volume level. You can only increase or decrease the volume step by step, so you may need to send multiple repeated signals, with a small delay in between, depending on how fast your TV can respond.
The benefits of an IR proxy
Make automations more intuitive
It was already possible to use IR blasters in Home Assistant, so why is using an IR proxy any different? One of the key differences is that it allows you to send commands to your TV, rather than to your IR blaster. You send the command to power on the TV rather than having to tell the IR blaster to send a specific code, which makes automations more intuitive.
Another major benefit is that some popular IR blasters require you to set up an account through a cloud server before you can use them. With an IR proxy, you can set everything up completely locally; your IR proxy never needs to speak to the cloud server at any point.
Infrared is old but still useful
It may feel like a step backward for Home Assistant to offer native support for infrared, a technology that has been replaced in many devices. However, there are still plenty of dumb devices that use infrared, and this update makes it easier than ever to control them.
Source: Read Full Article